Sunday, December 30, 2018

Photo2Q2.5: Light Painting

ISO 200, f/10, 10s
ISO 200, f/13, 4s

ISO 200, f/10, 5s

ISO 100, f/10, 8s

ISO 200, f/10, 8s
I tend to shy away from slow shutter simply because most of the images that I take don't need to utilize a slow shutter. In addition, it creates unattractive images (at least to me) when it's fiddled with, especially in portrait settings. You can usually fix brightness and grain in post production, but you can't really fix motion blur. Still, I am fascinated with some experienced slow shutter concepts, especially when utilized with fluids or star trails, etc.

Final image discussion: The last concept we tried was actually developed as a result of me wrapping my fairy lights around this ruler Mrs. Takemoto gave us. It was pretty interesting, and we tried different things like making as if Noah was running (3rd image) or using it as a unique background (1st image). In the final image, we had Noah stand as still as possible while I circled him with the light stick to create a transporter-esque effect. In retrospect, it looked quite cool, but after looking at the image, I just wish there was a way to minimize the blur from Noah moving despite him trying to stay as still as possible.

This in-class experience brings about two primary lessons: Light is important, and ensure that the subject you're photographing is either incredibly still, or you're on an incredibly still surface (that is, unless your subject needs to move). Slow shutter is a lot more reliant on how objects in the frame are moving and the amount of light allotted to you.

Working with peers was interesting. I have nothing against my peers, but for helping me understand slow shutter or inspiring an idea in slow shutter, this was pretty "eh". Yes, it was a new experience, but I just didn't find the exposures to be super compelling. Thus, this in-school practice was a 6-7 on a scale of 1-10. It helped, but not dramatically. Perhaps further independent manipulation of slow shutter will help widen the range of knowledge I have in this field.


Thursday, December 20, 2018

Photo2Q2.4: Bokeh Tasks 2-4

Bokeh Daytime


I felt that I was most comfortable doing portrait shots for this bokeh task. It was easier and recognizable to me, as I enjoy shooting candid portraits over simple objects. At the very least, I would want the object to manipulate with a subject somehow, so that's why I asked Reynaldo to balance his shoe on his hand (as shown above). Ensuring bokeh was in the background was quite easy as I was using a f/1.8 50mm lens. I left it wide open (smaller numbers) and adjusted accordingly. I needed the light to pass through some objects to get that circular blur as seen in the trees in the background of both photos, so I attempted various angles to include all of the necessary elements. I enjoy both of these shots for task 2 because of the obvious reason (candid), but also because they best reflect my knowledge on bokeh. Balanced lighting, wide aperture, sufficient lighting, etc.

Bokeh Artificial


I just played around with fairy lights for this concept and observed what kinda shots I could get out of using them when wrapping it around my camera. The challenge was mainly getting the lights to properly "align" and not interfere with the subject, while remaining an important part of the photo. Evening lighting was especially difficult, but a higher ISO adjustment seemed to do the trick, as I am able to remove some of the chromatic noise in post (and reintroduce some artificial noise to prevent the image from appearing unsharpened). 

Bokeh Custom


The primary struggle here was creativity and time constraints. I attempted to use the custom shaped lightning bolt as a metaphor for "flash photography" and stuck my film camera on the table, though I feel that I could've done much better (and actually do two concepts for this and artificial bokeh). I used an overlaying LED desk lamp for some lighting, but I think that some post-production work would've been ideal here (though it wasn't used).


These extra bokeh photos were from a last-minute shoot I did before attending the orchestra concert to kill some time. This shoot was the first in a while of portraits as my photography has indeed grown quite stagnant in interest, and I thought that this was a nice way to practice and to get back into the grind.

Monday, November 26, 2018

Photo2Q2.3: Natural Bokeh


Saturday, November 17, 2018

Photo2Q2.2: Halloween Bokeh

I am all too familiar with the concept of bokeh since my favorite and most addicting lens to use is my 50mm f/1.8. Watching the videos provided on Google Classroom, all of the information made sense. But there's always more to learn. Thus, when I learned about custom bokeh shapes, I was particularly interested in the effects it could provide to some photos. Now personally, I think it's too dominant of an element to include in a photo if done too excessively that the bokeh becomes the main focus of the photo instead of the object itself, so my initial impression was that the shapes needed to maintain the theme while not becoming such a dominant element. In essence, simple shapes > complex shapes.

Skull Candy

Psychotic Episode

Grave Digger
For all of the above images, I used a 50mm f/1.8. I tried experimenting with a 18-55mm f/3.5 kit lens, but results were pretty awful and the bokeh shapes did not appear to come out at all (resulted in regular orbs or darkened the image too much, but the size of the cutout may have had a role here).

After experimenting entirely with low light, I found that illumination of the foreground object is crucial due to the cutouts preventing some light from reaching the lens. Otherwise, you will end up with excessively grainy photos. In addition, my cutouts were a tad bit too large for the 50mm lens, so next time (likely for the custom shape tasks) I will elect to utilize an appropriately sized cutout. Distance to the object also mattered because sometimes the bokeh would be too out of focus to recognize, or the composition of the entire photo would be entirely different and undesirable. Therefore, balance and proper positioning of the objects utilized is important.

Wednesday, October 31, 2018

Photo2Q2.1 Fast Shutter Part 2

My initial project theme was on "displacement". Usually this would involve a liquid collision with a physical object, but due to some limitations, later concepts became immensely scaled down or differed from that idea. I was largely inspired by a slow motion YouTube channel I'm subscribed to. I've also drawn some experience from a sleuth of other places such as Google and particularly Pinterest. This is also where I decided to choose the variables/constants that I wanted to manipulate/keep respectively, where the physical objects were the variables and the involvement of a liquid was a constant.

Food coloring in water 1/500 f/1.8 ISO 1600

Food coloring in water 1/800 f/1.8 ISO 1600
Fried chicken cutlet 1/1000 f/2.5 ISO 1600

Fried chicken cutlet 1/1000 f/2.5 ISO 1600

Fried chicken cutlet 1/1000 f/2.5 ISO 1600
BTS


JV Softball 1/400 f/5.6 ISO 100

JV Softball 1/640 f/4.5 ISO 100

JV Softball 1/640 f/4.5 ISO 100
I will be selecting the second food coloring in water concept and the first JV Softball concept images to discuss.

In both images, showing frozen action/motion was crucial, but the food coloring one had far more artistic demonstration whilst the softball one was far more technical in demonstrating frozen action. The immense setup behind the food coloring photo was a challenge, as well as the fluorescent difficulties I had (explained in fast shutter part 1 post). As for the softball one, I believe that finding the right angle to capture the photo was particularly challenging, since there were a variety of areas that were restricted and gated off, but I found a spot (this is a game against Kaimuki at their field). As for editing and subjects, they were particularly easy and didn't require any setup (which in retrospect works against my stretch factor, but I digress). Editing for these photos required typical treatment according to the style in which I personally edit, but the food coloring photo required more coloring corrections. I feel that these photos best demonstrate my application and knowledge of fast shutter due to the work that went behind them, especially the food coloring one.

After completion of this fast shutter project, I am somewhat comfortable using fast shutter speeds. I understand that my demonstrations were indeed lacking in diversity and didn't tie in to my primary theme, and that I actually took step backs as the concepts progressed, which does not work in favor of providing stretch to this project. Still, on a scale of 1-10 I feel that I still float around 9-10. Finding a unifying theme has been a consistent difficulty with a majority of my photos this year, so I hope to improve that. All of the technical aspects of digital photography, I have a general grasp of. But truly capturing artistic theories and ideas will remain a goal of mine

Sunday, September 30, 2018

Photo2Q1.6: Best Photograph + Two


At this time, I feel that this photo is my best because it is one of the few that is capable of painting a textual image into viewers without the help of facial expressions. By taking it almost entirely away, the photo raises questions; what is she looking at outside the window? The lighting just so happened to be so bright on this day that when exposing for the subject, the outside became overexposed (but that's fine because it works with my goal with this image). A bit of retouching in Lightroom helped this image looked nice in a subtle way. I also used this for my graphic design project.


First quarter was very engaging and fun. Although I definitely fell behind due to external personal causes, I found all of the projects/assignments to be interesting and fun. I enjoyed the fast shutter water day where we all got wet for the sake of art and photography. I enjoyed my last homecoming at this school and captured some really great photos that I will likely attempt to get into Yearbook somehow, especially for the homecoming spreads.

I still feel that I am incredibly reliant on Lightroom, but that's okay for the beginning. I know that my goals early on this year were ambitious, especially with the current workflow I use for post production. I hope to utilize second quarter to my advantage and expand my skills in photography further.

Photo2Q1.5: Fast Shutter Part 1

Thumbnail
My project theme was originally "displacement", but it is such a vague term in retrospect. I was particularly interested in achieving the shots photographers are able to get with using food coloring, and simply expanded into a broader perspective from that point. They looked very neat and there's a lot of opportunity as to what one can do with the photos that result from it (like an overlay onto a graphic, for example). Also, from watching slow motion YouTube videos for quite some time (The Slow Mo Guys), I was interested as to how certain objects can very briefly displace or interrupt the motion of another or combine with another object to create a very brief but incredible image. Thus, anything that could displace another object (often going to be a liquid and a solid) was a constant with this project, whilst the primary variable I changed was the actual objects being used.

Flourescent light flicker difficulties
Now, initially, I thought that my camera was broken because when photographing the images at faster and faster shutter speeds, I noticed that these yellow fuzzy bars were running across my photos. They didn't show up on the viewfinder, so I did some research and found out that these actually occurred due to frequency of the fluorescent light. Having a faster shutter speed results in the flicker effect of the fluorescent to be captured more severely, but I could somewhat counteract this issue in post production. However, only up to a point. Thus, some images may show a dramatic change in temperatures, but these were all made with the intention of counteracting the effect of the flicker as much as possible. I limited my shutter speed to around 1/500 to prevent this flicker effect as much as possible. I did want to go to faster shutter speeds, but the effect would appear as shown in the image above.


1/500 f/1.8 ISO 1600
1/640 f/1.8 ISO 1600
1/1250 f/1.8 ISO 1600
1/800 f/1.8 ISO 1600
BTS
BTS
I set up the above shoot using some construction paper I had lying around (they're kinda like plastic paper, not sure what they're called), two glass vases I found from Target (the wider one will be used in a later fast shutter project), and food coloring I bought from Safeway. This concept was largely a technical demonstration of fast shutter, but was unfortunately sidetracked due to the fluorescent lighting issues. The biggest challenge with this sub-concept is the difficulty in the fluorescent light and the focusing. Using a f/1.8 aperture, there was a very shallow depth of field for all of these images. I didn't want the vase to be much of a distraction, nor did I want any excessive particles on the paper to show up in the images, hence the large aperture. I chose the photos listed as my top photos as they achieved the focus the best and had the least amount of lighting issues, and they looked most appealing to my eye.

On a scale of 1-10 in terms of knowledge of fast shutter, I feel that I am a 9. I understand a large majority of the components in regards to it, but I knocked off a point personally because I have produced a very small amount of content that actually relates to fast shutter, or had a fast shutter in mind as a primary focus for a photo.

AP classwork has complicated a lot of the time that I wanted to use for this project, thus my artistic stretch is low for this sub concept. I attempted to incorporate at least some sense of artistic stretch through the combination of various colors and angles of the vase, but the colors were quite limited so I did what I could (4 total vials were provided). I feel that, moving into part 2 of this project eventually, I will definitely need to up the creative innovation through having a wider range of objects and camera angles, and perhaps even diversifying the sub concepts from their current primitive states.

Photo2Q1.4: Pre-Fast Shutter Speed


tomato splash


All of the above images were grabbed from Pinterest.

In order to demonstrate my understanding of fast shutter speed, I will be doing "displacement" as a theme for my project. I am electing to focus on this because they, like many things in life, are brief moments in time that often go unnoticed because they are simply too fast and are "second-hand" to the beginning and end of the action. I feel that using various food coloring droplets into water will help illustrate that.

Based on the feedback, I feel that the main stretch will come in how I incorporate the supplies into this project and attaining the necessary materials in the first place. I've acquired the glass vases, wallpaper backgrounds, and food coloring, but not yet the necessary materials for dropping fruits and other objects into water. In all categories, lighting will be a big stretch as I don't have the greatest equipment, but I think that using Lightroom to manipulate some of the properties of the photo would help, but I'd like to shy away from that as much as possible.

I feel that the biggest difficulty with this project will just be execution. I have a general idea of what I want to do in order to achieve these photos, but really rolling this out is going to be interesting. It's definitely possible to pull off though.

Photo2Q1 (Bonus): Homecoming 2018


These photos were from the class cheer competition and homecoming parade. Was fun; seniors won the overall competition so that's all that matters.

Photo2Q1.3: One Hour Photos in a Bag

This activity was very interesting and fun to do because of the difficulty that was added to it. The objects were very interesting and difficult to incorporate, however I feel that in order to grow as a photographer, sometimes you need to be given limitations and constraints. Mainly, my idea with the objects I was given was to mix them together and literally integrate them into nature somehow I intersected items together and put them with nature and tried to see how they interacted with each other.

Lens^2 
Global Warming


Greenhouse Effect

The Ball(oon) Family
Photographing with impromptu items was great and insightful for incorporating prompts into any of my projects. I think that using incorporating gestalt organizers (graphic design concepts) into my photography will really be able to change the way I see framing in photography, and I felt that this project was great for that. I would have liked there to be more textured choices in objects (as almost all of the objects I used were quite "dull"), but that would somewhat remove the limitation aspect of the assignment and cause one to be less creative, but that's just me. I enjoyed the freedom in theme/topic as it allowed me to be more expansive, but for other assignments this probably wouldn't be ideal as most of my photos end up dealing with people, and most of the time people need a theme. I'd definitely like to do something open-ended like this in the future.

Photo2Q1.2: Camera Tasks

Thumbnail (for now)

I often utilize my ISO settings last and prefer to keep it at around 100 or 200. Obviously, situations change, but most of my photos require natural and good sunlight (something Hawaii provides an abundance of). Thus, I use it last. For darker, evening, and indoor environments, I may bump it up higher in the 400-1600 range, but I highly shy away from those as I like adding my own grain; not the destructive color grain that comes with high ISO on most cameras.


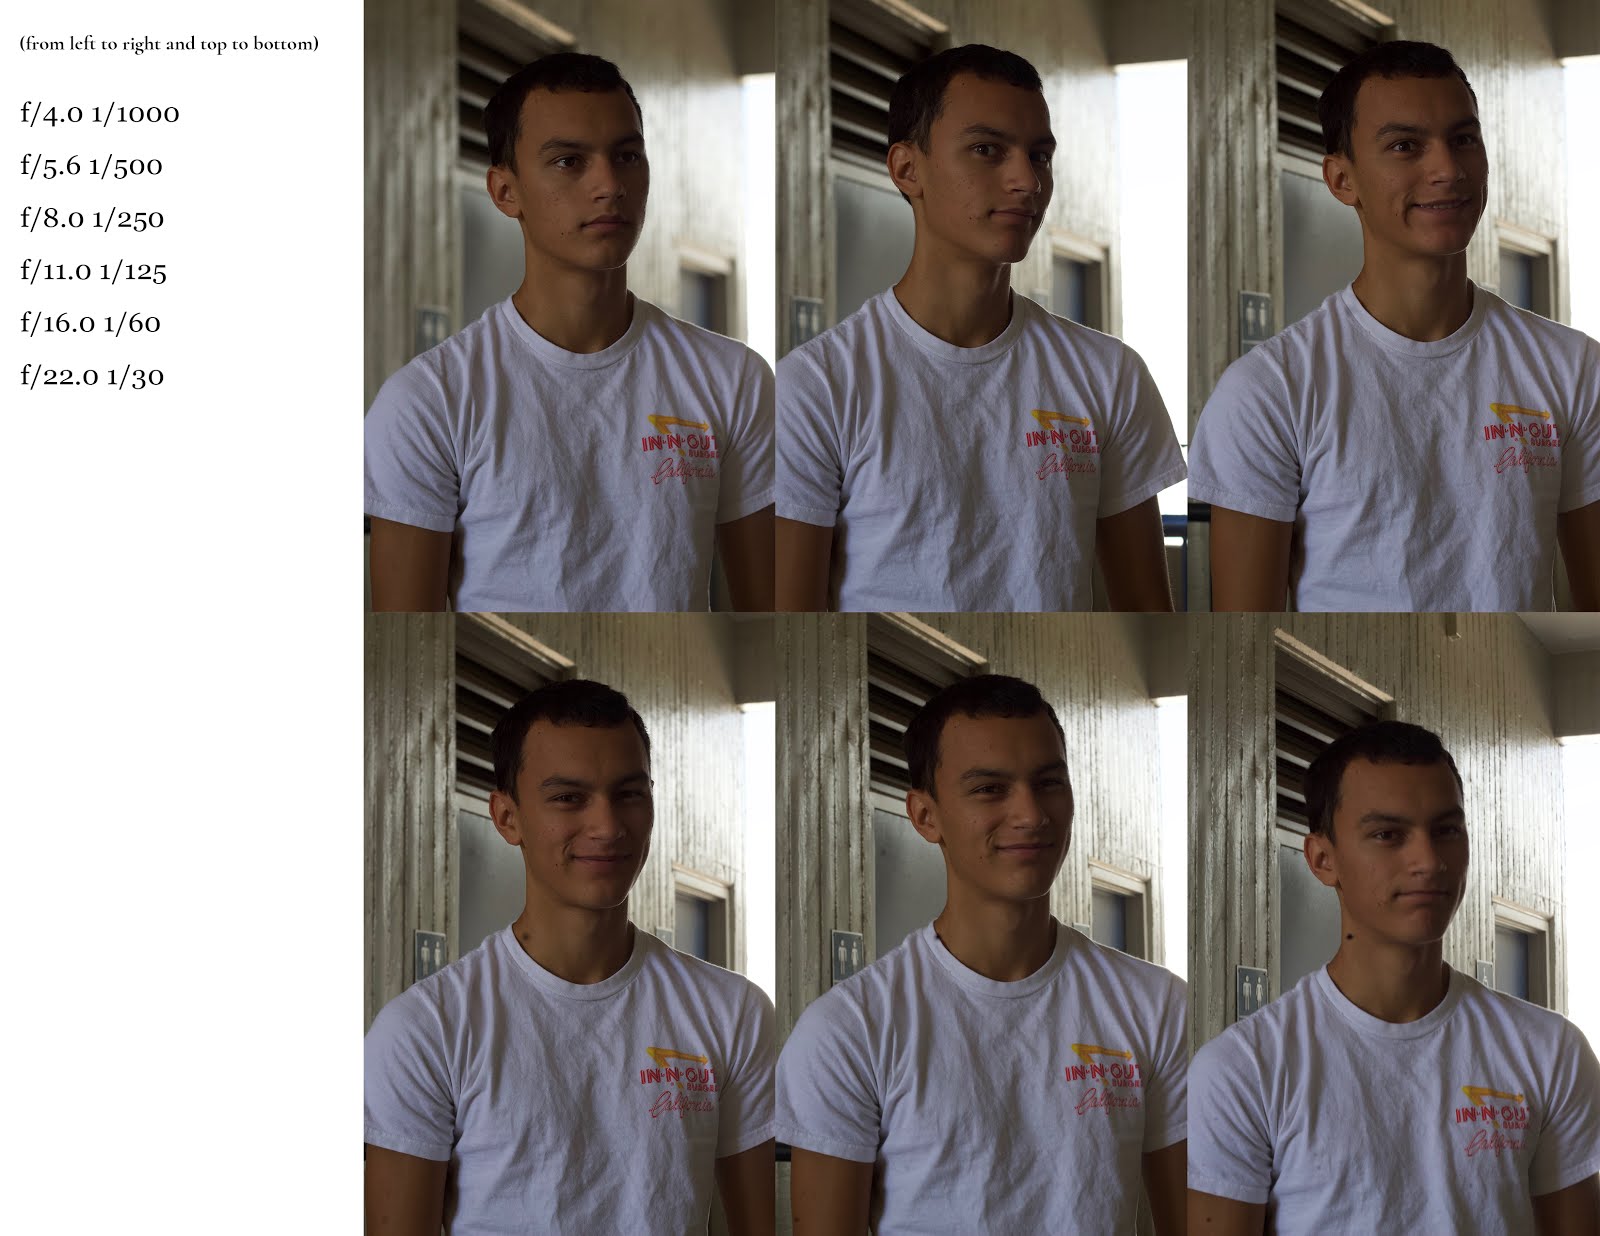
The aperture is the very first thing I adjust when I'm trying to expose for an image. Attaining the right depth of field for your image really all depends on what type of photo you want to take. For example, for portraiture, you usually would want to isolate the subject. Thus, a lower f/stop (wider aperture) number would be logical. If you want to get as much of your photo in focus, like a landscape photo, then you'd go for higher f/stop numbers (smaller aperture). You adjust the other parts of the exposure triangle accordingly.


When conducting the equivalency slant charts for indoor and outdoor photos to expose the same photo with different f/stops and shutter speeds, one can certainly take note of all of the aperture changes and especially how slow/fast the shutter is at different speeds. I have a large background in exposing for the right situation, but these equivalency charts definitely helped me to understand just how risky it is to aim for slower shutter speeds when you're shooting handheld.
f/6.3 1/25
f/22 1/4
To achieve these shots, I merely had to use slower shutter speeds. I tried using the shutter priority mode, but I did not like how drastically it changed the aperture (for example, f/22 is far too small of an aperture for my liking for these photos). Choosing a moving object and a constant background proved simple and are reflected in the simplicity of these photos, but if lighting was not as available as it was on this day, I'd definitely try to play around with aperture and ISO to balance out. A tripod may have also helped.

f/18 1/40
f/18 1/80
For these photos, timing and motion of your body is essential. You definitely need your vestibular sense and kinesthetic sense to be able to "track" it with your subject, or at least moving the camera accordingly. I did not have good success with tracking a close human subject and it was quite rushed, but with a car it is slightly easier as they are more distant from the camera.

f/1.8 1/640
f/2.0 1/1250
In poor indoor lighting condition, it definitely would make sense to stretch out the capabilities of one's ISO settings to capture the images without sacrificing depth of field and shutter speed. I felt that the second photo of the two proved successful in capturing great shutter speed control and isolation of the subject (which in my case was simply trying to capture the detail in the popping/spurting bubbles).

f/2.5 1/3200 
f/3.2 1/3200

f/5.0 1/1250
Capturing fast shutter was relatively easy as you have less "moving parts" to worry about camera-wise, but more moving parts to worry about real life-wise. On this day, lighting was in great abundance, so all we really needed to worry about was how we were going to setup the action/photo itself, how we splash water onto the subjects, etc. It's less technical difficulty and more conceptual difficulty.

Overall, this project was a nice refresher mainly in the fast shutter avenue. The other exposure controls were very familiar to me, and I feel that this project proved that. I definitely hope to incorporate the fast shutter concepts into my own projects in the future as it is fun and interesting to create those kinds of images. They may prove difficult, yes, but the challenge is great and could potentially expand my range of photography beyond just portraiture and street.
shimabukuro photos © , All Rights Reserved. BLOG DESIGN BY Sadaf F K.